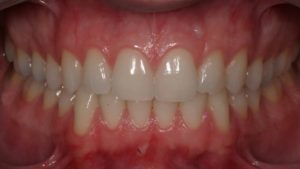
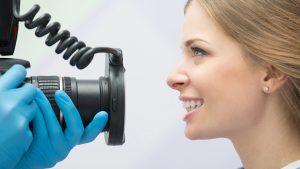
Dental photography often poses challenges due to the complexities of equipment selection and settings. In this three-part series, my goal is to demystify the process and make dental photography accessible to all. In this initial episode, I’ll focus on essential equipment, from cameras and lenses to flashes and more.
Acquiring your own camera offers numerous benefits. Having your camera readily available increases the likelihood of regular photography. This eliminates the need for preplanning or borrowing practice cameras. Additionally, it’s a long-term investment that enhances patient communication and facilitates learning from your work.
The camera setup comprises three key components: the body, lens, and flash. The linked blog post provides equipment suggestions, along with prices and specifications. Opting for a lightweight setup is recommended, as it simplifies photography. Sticking to a single brand enhances compatibility and reliability.
For the camera body, both Canon and Nikon DSLRs are suitable choices. While Canon offers a broader lens and flash selection, Nikon has its own merits. Sony mirrorless cameras are also an option, though they might lack resources for beginners. Factors like sensor type should be considered, along with whether advanced features like wireless flash control are necessary.
Mirrorless cameras, such as Sony’s, introduce an innovative avenue for dental photography. Compact and suitable for one-handed operation, they feature focus peaking, a game-changer for precise focus. Focus peaking highlights areas in focus, transforming the shot-taking process, especially during procedures.
The choice of lens plays a pivotal role. A macro lens with a 1:1 magnification ratio is essential. Focal length is a significant factor—90-105mm focal length lenses are ideal for dental photography. When selecting a lens, opt for lightweight options that fit your budget. Brands like Tamron, Sigma, and Samyang also offer viable alternatives.
Flashes significantly impact photo appearance. A ring flash is user-friendly and yields consistent results for anterior and posterior shots. Twin flashes offer more aesthetically pleasing reflections on anterior teeth. For advanced users, mounting twin flashes on a bracket elevates results further. The choice depends on your preferences and requirements.
Diffusers are vital for achieving softer lighting. These can be purchased or made using tracing paper and Velcro. Battery choice is critical for flashes; rechargeable nickel metal hydride batteries like Ikea’s offer cost-effective solutions. A fast SD card is necessary for efficiently handling multiple image files.
An appropriate camera bag is essential to safely store your equipment. Additional items include cheek and lip retractors, contrastors, mirrors, and microfiber cloths. Proper mirror care is crucial to maintain their quality. Accessories like a camera strap and blower for sensor cleaning complete the kit.
This comprehensive guide equips you with knowledge to build an effective dental photography setup. Each piece of equipment contributes to delivering high-quality dental images. Stay tuned for the next episode, where we’ll delve into camera settings and optimization techniques.


