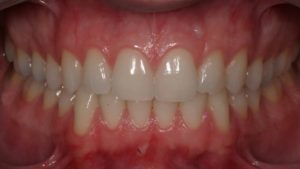
So you know about your camera settings, but you are still probably thinking, what photos should I take? In this video, we will talk about different images that you could take of your patients.
Hello and welcome to another video from the Comprehensive Dentist. My name is Dr. B, and in this video, we will discuss various dental photos that you could take. We will look at multiple options in this video, and I will tell you what I like to do, and hopefully, it will give you some ideas so you can decide what photos will work best for you.
Now, if you are learning dental photography to document a board case, you should know that your respective board will likely have specific dental photos they want you to take for your case. Follow their guidelines if this pertains to you. But if you’re just a dentist who wants to document some cases, educate your patients, use photos for treatment planning, or similar purposes, then today we will look at some options you have for dental photos.
So much like camera settings, there are many options and variety amongst providers regarding what photographs they take of their patients. Today, I will show you what I do, and in the end, you have to decide for yourself what photos you would like to take for your patients. I honestly believe there is no wrong answer here because the correct answer to „What photos do I take?“ is really up to you.
Let’s go ahead and look at the different photo series that I currently use for my patients. I say „currently“ because in a year, I may have tweaked this photo series further. I may find that some shots are not as helpful for what I do and may decide not to include those shots in the future.
Currently, when I decide I want to take photographs of my patient, I will choose from four different photo series options depending on what I think we are going to document and do as part of the treatment.
Basic 12 Series: My typical photo series is what I call the Basic 12. These are 12 patient photographs that I use for the majority of the patients I plan to treat. I don’t document all of my patients, but if I’m going to do a decent amount of work on a patient or if I think it is an excellent case to document, I will often use the Basic 12 photo series as a starting point. I will typically take these 12 images before and after treatment.
Full Series: For comprehensive cases that involve any anterior aesthetic treatment, I will choose to take the Full Series option of photographs. This series of photographs includes extra-oral images and intra-oral images. The Full Series consists of a total of 24 shots, 10 extra-oral and 14 intra-oral photos. You will notice that some of the Basic 12 are also in the Full Series, which is correct. I pick either the Basic 12 series or the Full Series for my specific patients.
Specific Series: Besides the Basic 12 and the Full Series of photographs, I also have patients I treat for specific things. For example, I have dental sleep medicine patients that I treat with oral appliances. This is an example of a photographic series I use for those types of patients. This series typically includes a minimum of nine photos. I also have orthodontic patients that I treat, and I have a specific series of photos that I take to document their cases. These include 10 extra-oral images and 6 intra-oral images.
Specific Shots: These are images I take for particular situations. For example, if I treat a patient restoratively and I find a crack in the tooth, I may take a photo of the tooth that allows me to show the patient the crack. Another example could be taking a picture of an abscess or an oral pathology that I discovered. These are just very specific shots of things that I want to capture.
Now that you’ve seen some examples of various shots and photographic series options that I use in my practice, you need to decide what images would benefit you and your situation. The examples I’ve shown you were created using a Keynote presentation. You could also use PowerPoint, and these can be printed out and placed close to where you take photos so you can remember what shots you want to take for various situations.
Alright, so now that you have an idea of different types of images that you can take, the next thing we need to cover is the technical aspect of shooting these images, and by that, I mean taking the photos.
My Full Series photo option includes 24 different photographs and is the most inclusive photo series that I use. In the next couple of videos, we will go into detail on each individual shot. I will show you how I position the patient, how I position myself, how we are using retractors and mirrors, and discuss key considerations for each shot to make it the best it can be.
If you found this video helpful, hit that like button and be sure to subscribe if you have not already. I want to thank you for watching the Comprehensive Dentist, and hopefully, you’re learning some new things to make you a better dental provider. I will see you next time.


