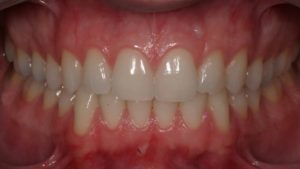
Clinical dental photography is a crucial aspect of modern dentistry, allowing for accurate documentation and assessment of oral health. In this guide, we will delve into the essentials you need to know for successful clinical photography.
Camera Setup: A Digital Single-Lens Reflex (DSLR) camera is recommended for optimal results. Popular brands include Canon and Nikon, both offering excellent options. A DSLR provides high-quality images, even with more affordable models.
Components:
- Camera Body: Choose a suitable DSLR body that fits your preferences and budget.
- Macro Lens: Invest in a 100mm macro lens for detailed shots of teeth and oral structures.
- Ring Flash: Attach a macro ring flash to your lens for proper illumination within the oral cavity.
Positioning: To capture accurate images, proper patient positioning is essential. Use cheek retractors to expose the teeth fully and mirrors for different angles.
Accessories:
- Contrastor: A contrastor creates a dark backdrop to emphasize teeth, making it valuable for documenting aesthetic cases.
- Mirror Holder: Attach mirrors to a holder to maintain proper angles without fingers obstructing the shot.
Benefits of Kits: Consider purchasing dental photography kits that include a camera body, macro lens, ring flash, mirrors, and retractors. Kits ensure compatibility and a streamlined setup.
Camera Brands: Opt for one brand for all components to ensure compatibility and ease of use. Canon and Nikon are popular choices.
Conclusion: By understanding the necessary components and techniques, you can achieve high-quality clinical dental photography. Whether you’re documenting aesthetic cases or simply improving your patient records, proper equipment and positioning are key. Feel free to explore reliable sources for photography kits that suit your needs. Remember to subscribe for more informative content, and happy clinical photography!


