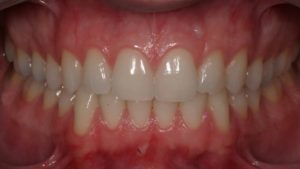
In the process of smile simulation, it all begins with taking a photograph. Dr. Mike captures a picture of his patient, emphasizing the importance of getting a good photograph. The setup includes a neutral background in his office, not the dental chair, to ensure proper lighting and clarity. Adobe Bridge in Photoshop is suggested for organizing and comparing photographs, making it ideal for smile simulation.
Dr. Mike takes multiple photographs of his patient, maintaining an appropriate distance to avoid distortion. Adequate lighting is achieved without being too far away, ensuring effective use of flash. Afterward, reviewing the photos with the patient becomes crucial. Although patients might find imperfections in themselves, choosing a photo they don’t dislike is key for a successful smile simulation.
Noteworthy factors for successful portrait photography include the right focus and exposure. Manual focus or careful use of the auto mode can enhance image sharpness, especially focusing on critical areas like the eyes. Adjustments using Camera Raw, a non-destructive tool, can rectify issues such as red-eye reduction or excessive softness. Attention to lighting conditions, like avoiding ambient light and using a flash, enhances the overall quality of the portrait.
However, certain pitfalls should be avoided. Capturing portraits of patients in dental chairs is discouraged due to background and patient comfort issues. Additionally, uncontrolled lighting can introduce color distortions and unwanted shadows. Proper framing and background choice contribute to high-quality smile simulations, ensuring realistic and appealing results. Consistency in distance, lighting, and framing across multiple portraits simplifies post-processing efforts and yields better outcomes.


