If you’ve been watching since the start of this series, you’ve covered a lot of ground and hopefully gained a lot of useful information. We’ve discussed the foundational aspects of dental photography, and now it’s time to start capturing some photographs. Grab your camera, and let’s begin.
Hello and welcome to another video from The Comprehensive Dentist. My name is Dr. B, and in this video, we will learn how to take extraoral photographs of our patients. I’ll go into depth on each shot, showing you how I position the patient and myself for these images. We’ll cover all the extraoral photos that I take as part of my full series of patient photographs. I hope you can watch and understand how to execute these photographs yourself.
As I’ve mentioned in previous videos, this is my technique for patient photos, and there are various ways to do this. I’ve studied dental photography extensively and seen many approaches. The technique I’m sharing works for me, but you might decide to do it differently, which is entirely up to you. For my technique, I require a patient and one assistant. The assistant is crucial for intraoral images involving mirrors, but for extraoral photos, you’ll see that most shots can be taken without an assistant. However, I do use my assistant to hold up a background during full face photographs.
Keep in mind that the order in which I shoot these images is intentional. I start with standing photos, then transition to sitting and finally lying back in the chair. So, let’s dive into the extraoral images.
For full face shots, I position the patient in front of a neutral background, which can be white, black, or a neutral color. I usually take these photos in the operatory where I conduct my exams. The patient stands against the wall, and I position them to minimize shadows on the background. This might require adjusting their distance from the wall. My camera is directly in front of the patient, pointed straight at their face. If the patient is taller or shorter, I adjust my positioning to ensure our faces are level.
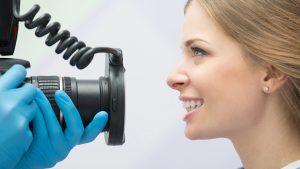
For smiling images, I aim to capture a natural smile, but exaggerated or big smiles are good too. In profile shots, the patient turns slightly while maintaining certain landmarks in line with the camera. The patient’s eyes and teeth are crucial in the profile view.
Moving to extraoral up-close shots, the patient sits in front of me, knee to knee. We ensure our faces are level to capture the best images. Up-close smile shots are similar to full face shots, with slight differences in positioning.
In the 45-degree left and right images, the patient turns slightly so that their lateral incisors are directed at the camera. This creates a pleasing angle and shows off the patient’s smile.
The final extraoral image I take is a smiling profile shot. The patient faces to the side, and this shot captures the anterior-posterior relationship of the maxillary incisal edges to the lower lip while smiling.
These extraoral photos are straightforward, and in the next video, we’ll delve into intraoral photography. As we introduce mirrors, some shots become more challenging, but with practice and following my technique, you’ll become an expert in no time.
If you found this video useful, please like it and leave your comments below. Thank you for watching, and I’ll see you in the next video where we discuss intraoral photos.

