Alright, so last time we went over how to shoot extra-oral dental photos. In this video, we are going to go over how to shoot intra-oral images.
Hello and welcome to another video from the Comprehensive Dentist. My name is Dr. B, and in this video, we are going to continue learning how to take dental photographs of our patients. Today we are going to learn how to shoot intra-oral images using retractors and mirrors. I will go into some depth on each shot and show you how I position the patient, myself, and my assistant for these images.
I prefer to shoot all these intraoral images with an assistant to make things easier and predictable.
You can shoot your dental photographs by yourself, and that is an alternative technique to how I take my dental photos. I prefer to use a dental assistant for intra-oral pictures to help, and I can focus on my camera settings and composition. In some ways, as the person holding the camera, I can see from the camera’s perspective what is going on with the retractors, mirrors, and everything else in the image. I act as a director, if you will, helping the patient properly position the retractors, telling them how to hold their teeth, whether being fully closed, slightly open, or wide open. I also help the assistant position the mirror in the best location, and they help me with moisture control. I always have the assistant operate the mirrors and an air-water syringe. The air-water syringe is used to blow saliva off the teeth to keep the teeth and tissues as dry as possible. The air-water syringe also helps defog the mirrors. In addition to the air-water syringe, I will encourage my patients to suck in their spit and swallow to clear out as much as possible. In some cases, I will also have my assistant use a saliva ejector to clear saliva before taking photos. The assistant helps with the mirrors and controls moisture while I concentrate on framing the shot and capturing a good image.
For all the intra-oral photos, I have the patient lying back in the chair in a supine position. I like to have the patient raise their chin in the air so their mouth is pointed more towards me, where I am standing at the top of the head at the 12 o’clock position of the dental chair. These images require the patient to use retractors to pull the lips and cheeks off of the teeth. Have the patient pull out and forward when shooting maxillary shots. They will pull out, forward, and upward for mandibular photos. They will pull outward, forward, and downward with the retractors. For these images, we will be shooting using an aperture starting point of f/25. When we use the mirror images, I will often have my assistant use a mirror handle. I find this especially helpful for the occlusal photos to minimize accidentally getting the assistant’s fingers in the final image.
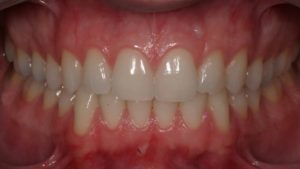
Just as the name implies, for this image, the patient will bite together in maximum intercuspation and retract using the retractors. Compose the image so that you can see all the teeth from right to left of the image. The incisal plane should parallel the horizon or the upper and lower borders of the image frame. The midline is the center of the image. Focus on the canine so you can get all the teeth in focus.
This shot is framed exactly like the retracted teeth together image, except for now the patient is slightly open with the teeth apart so you can visualize the incisal edges of all the anterior teeth.
Starting with the same position as the retracted teeth apart image, have your patient turn their head 45 degrees left and right for these two photographs with the teeth slightly apart. Have your camera pointed directly at the lateral incisor.
Now, we begin some photos using mirrors. We will go over this when we discuss editing, but mirror shots will need to be flipped horizontally when editing since they represent a reflected image through the mirror. These photos start with the patient retracting with both left and right retractors. The assistant will put the mirror in on the side we plan to shoot and place it as far back as they can. Once the mirror is in place, the patient will remove the retractor on the side where the mirror is located. I frequently have to help my assistant properly position the mirror. As a side tip, before you bring the camera up to your face, try to visualize the shot you want with the correct composition with your eyes first. I will look at the placement of the mirror and patient with my eyes and help my assistant place the mirror in the correct position. Once it looks good to my eyes, I will then bring up the camera and take the photo. For the buckle images, the teeth are together in maximum intercuspation, and the occlusal plane in the image is parallel to the image upper and lower border of the frame. My goal is to capture, at a minimum, from the canine to the most distal tooth in the arch. Try to focus on the first or second premolar area to get all of the teeth in good focus.
For the upper linguals, I have the patient retract out, forward, and upward. The assistant places the mirror closer to the midline of the palate and angles it away from the teeth toward the camera. For the lower linguals, I have the patient retract out, forward, and downward. The assistant will place the mirror between the teeth and the tongue and retract the mirror towards the midline of the mouth, away from the teeth and towards the camera.
These are two images that I will take using a black contraster. I take an upper and lower image. For both, I desire to capture from canine to canine. The incisal plane should parallel the upper and lower border of the image frame. The midline is centered. A good focus point for this image is the lateral incisor. The primary goal of the patient retracting is to try and get the lip off of the anterior teeth. The black contraster is placed behind the teeth to create a solid black background in the final image.
Alright, so that wraps up all the intra-oral images that I take. As you study dental photography more and more, you will find that there are other images that people take that I did not include in this video. Again, this is my technique and the images that I prefer to take in my practice. These intraoral photographs are challenging and can be tricky to the beginner. If I can offer just one important tip, it would be to visualize the shot with your eyes before you bring the camera up and get tunnel vision. If you are looking directly at the patient and the retractors and mirrors are not where you need them, it will not get any better when you bring the camera up to your face. So position everything and check it visually first, and then take the photo.
If you learned something useful and found this video to be helpful, please hit that like button. If you are not a subscriber, go ahead and hit that subscribe button so you don’t miss out on tips and tricks like the ones you learned today. I want to thank you for watching this channel, and I will see you next time

